22.6.5 Drawing
This chapter focuses on the drawing and operations of graphical objects. Graphical objects refer to the various objects produced by the shape drawing tools provided by the widget. Furthermore, users can input the image files uploaded to the server.
Drawing tools provide the drawing of basic graphic objects, including lines, rectangles, circles, ovals, text, poly-lines, polygons, Bezier curves, pie, dashboards, buttons, drag areas, arcs, images, and components. The user can also click on a tool in the status column to define the shape lines and colors in advance.
l Change size, move, rotate:
n Move: When the mouse moves over the object, a cross sign will appear. At this time, left click the object to drag it to the selected position on the canvas and move the object to this place.
n Scale: After clicking on an object on the canvas, a selection box will appear in the surrounding area. In addition to thecircle and arc, other objects selected show eight endpoint squares on the edge of the marquee. The circle and arc have four endpoint squares. When the mouse moves to any of the eight endpoints, a double arrow icon will appear. As long as you press the mouse, the size of the object can be changed.
n
 |
22.6.5.1 Line
You can draw a line using the following procedure:
n Click the "Line" icon in the toolbar.
n Move the mouse to the middle plot; the screen will show the reference line. Left click the mouse and drag it to the position of the second point; after releasing the left button, the "line" object will be made.
n Press ESC to cancel the drawing.
Adjustable/Support Properties for Line:
Position: Height, Width, X- Coordinate, Y-Coordinate
Pen: Width, Stroke Dash, Pen Color
Animation: Move, Rotate-C, Rotate-CC, Scale, Scale-H, Scale-V
Alarm Status: Alarm-Status, Alarm-Type, Digital-States, Multiple-States
22.6.5.2 Rectangle
You can draw a rectangle using the following procedure:
n Click the "Rectangle" icon in the toolbar.
n Move the mouse to the canvas; the screen will show the reference line. Left click the mouse and drag it to the position of the rectangle’s left upper corner; after releasing the left button, a "rectangle" object will be made.
n Press ESC to cancel the drawing.
Adjustable/Support Properties for Rectangle:
Position: Height, Width, X- Coordinate, Y-Coordinate
Pen: Width, Stroke Dash, Pen Color
Others: Fill Color, Rotate, Rounded Radius
Animation: Move, Rotate-C, Rotate-CC, Color, Fill, Scale, Scale-H, Scale-V, Bar-R, Bar-L, Bar-U, Bar-D
Alarm Status: Alarm-Status, Alarm-Type, Digital-States, Multiple-States
22.6.5.3 Circle
You can draw a circle using the following procedure:
n Click on the "Circle" icon in the toolbar.
n Move the mouse to the canvas; the screen will display the reference line. Left click the mouse on the canvas to be the circle’s center position. Drag the mouse to the radius end. After releasing the left button, a "circle" object will be made.
n Press ESC to cancel the drawing.
Adjustable/Support Properties for Circle:
Position: X- Coordinate, Y-Coordinate
Pen: Width, Stroke Dash, Pen Color
Others: Fill Color, Rotate
Animation: Move, Rotate-C, Rotate-CC, Color, Fill, Scale, Scale-H, Scale-V
Alarm Status: Alarm-Status, Alarm-Type, Digital-States, Multiple-States
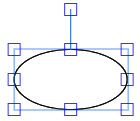
22.6.5.4 Ellipse
You can draw an ellipse using the following procedure:
n Click on the "Ellipse" icon in the toolbar.
n Move the mouse to the canvas; the screen will display the reference line. Left click the mouse on the canvas to be the vertical point of the intersection. Drag the mouse to the vertical point of the intersection. After releasing the left button, an " Ellipse " object will be made.
n Press ESC to cancel the drawing.
Adjustable/Support Properties for Ellipse:
Position: Height, Width, X- Coordinate, Y-Coordinate
Pen: Width, Stroke Dash, Pen Color
Others: Fill Color, Rotate
Animation: Move, Rotate-C, Rotate-CC, Color, Fill, Scale, Scale-H, Scale-V
Alarm Status: Alarm-Status, Alarm-Type, Digital-States, Multiple-States
22.6.5.5 Text
The following procedure will create a textbox:
n Click the "Text" icon in the toolbar.
n Move the mouse to the canvas area, and right click the mouse at any point; a text input area will be created after releasing the right button.
n Input text into the input area; after completing the input, move the mouse to the non-text input zone and left click the mouse or press the Enter key to create a "Text" object.
n Press ESC to cancel the drawing.
Adjustable/Support Properties for Text:
Position: Height, Width, X- Coordinate, Y-Coordinate
Pen: Text Outline
Others: Fill Color, Rotate, Text Size, Font Family
Animation: Move, Rotate-C, Rotate-CC, Color, Fill, Scale, Scale-H, Scale-V, R-Text, L-Text, C-Text
Alarm Status: Alarm-Status, Alarm-Type, Digital-States, Multiple-States
22.6.5.6 Polyline
The following procedure will create a polyline:
l Click the "Polyline" icon in the toolbar.
l Move the mouse to the canvas, and left click the mouse at any point on the canvas. Drag the mouse to the drawing area, and left click the mouse a number of times; right click the mouse or press enter button to create a "polyline" object.
l Press ESC to cancel the drawing.
To modify this object,
l Left click on the object; once the marquee shows up, right click the mouse within the marquee. At this point, two reference lines will enter editing mode, and the object’s top will show a green auxiliary editing endpoint.
l Move the mouse to a reference point position. The system will select the editing endpoint closest to the reference point, as well as make a change to the two adjacent endpoints. After confirming the reference point by left clicking the mouse a green reference link will change the editing endpoint and mouse’s arrow.
l Once the position has been changed, left click the mouse to complete the modification.
Adjustable/Support Properties for Polyline:
Position: Height, Width, X- Coordinate, Y-Coordinate
Pen: Width, Stroke Dash, Pen Color
Others: Fill Color, Rotate
Animation: Move, Rotate-C, Rotate-CC, Color, Fill, Scale, Scale-H, Scale-V
Alarm Status: Alarm-Status, Alarm-Type, Digital-States, Multiple-States
22.6.5.7 Polygon
A polygon can be produced using the following procedure:
l Click the "Polygon" icon in the toolbar.
l Move the mouse to the canvas, and left click the mouse key on any point in the canvas as the starting point. Drag the mouse to the drawing area to clock the left mouse bottom, and then right click the mouse or press enter; the final point and starting point close the object to create a "Polygon" object.
Press ESC to cancel the drawing.
To modify the polygon object:
l Left click the object; after the marquee appears, right click the mouse within the range. At this point, two reference lines will enter editing mode, and the object’s peak will also show the green auxiliary editing end point.
l Drag the mouse to the position of the reference point. The system will select the editing end point nearest to the reference point, as well as the adjacent points to change. After confirming the reference point by left clicking the mouse, the editing end point and mouse arrow connected by a green reference line will appear.
l Once the change position has been confirmed, left click the mouse, and the relevant end point can be modified and completed.
Adjustable/Support Properties for Polygon:
Position: Height, Width, X- Coordinate, Y-Coordinate
Pen: Width, Stroke Dash, Pen Color
Others: Fill Color, Rotate
Animation: Move, Rotate-C, Rotate-CC, Color, Fill, Scale, Scale-H, Scale-V
Alarm Status: Alarm-Status, Alarm-Type, Digital-States, Multiple-States
22.6.5.8 Bezier curve
The following procedure can create a Bezier curve:
n Click the "Bezier" icon in the toolbar.
n Move the mouse to the canvas, and left click the mouse at the starting point; drag the mouse to the drawing area and continuously left click the mouse. Right click the mouse or press Enter to create a Bezier object.
n Press ESC to cancel the drawing.
Adjustable/Support Properties for Bezier:
Position: X- Coordinate, Y-Coordinate
Pen: Width, Stroke Dash, Pen Color
Others: Fill Color, Rotate
Animation: Move, Rotate-C, Rotate-CC, Color, Fill, Scale, Scale-H, Scale-V
Alarm Status: Alarm-Status, Alarm-Type, Digital-States, Multiple-States
22.6.5.9 Pie
The following procedure can create a pie shape:
n Click the "Pie" icon in the toolbar.
n Move the mouse to the canvas and left click. Drag the mouse to the canvas area, and left click the mouse for the radius end point.
n Drag the mouse to depict the pie’s range. After confirmation, release the left button, and a “pie” object will be created.
n Press ESC to cancel the drawing.
Adjustable/Support Properties for Pie:
Position: X- Coordinate, Y-Coordinate
Pen: Width, Stroke Dash, Pen Color
Others: Fill Color, Rotate
Animation: Move, Rotate-C, Rotate-CC, Color, Fill, Scale, Scale-H, Scale-V, Pie-C, Pie-CC
Alarm Status: Alarm-Status, Alarm-Type, Digital-States, Multiple-States
22.6.5.10 Panel
WebAccess provides a built-in instrument Panel object, which can be created according to the following procedure:
n Click on the "Panel " icon in the toolbar.
n Move the mouse to the canvas area; a reference line will appear. Left click the mouse at the left higher top position. Drag the mouse to the other position of the screen; after releasing the left button, a "Panel " object will be created.
n Press ESC to cancel the painting.
Adjustable/Support Properties for Panel:
Position: X- Coordinate, Y-Coordinate
Others: Transparent, Left Top Color, Panel Color, Frame Color, Right Bottom Color, Outer Frame, Centre Frame, Inner Frame, Frame
Animation: Frame
22.6.5.11 Button
To produce a button, perform the following procedure:
n Click the "Button" icon in the toolbar.
n Move the mouse to the canvas; the screen will show the reference line. Left click the mouse in the upper left corner, and drag the mouse to another position; after releasing the left button, a "Button" object will be made.
n Press ESC to cancel the drawing.
Adjustable/Support Properties for Button:
Position: X- Coordinate, Y-Coordinate
Animation: Left Top Color, Button Color, Transparent, Right Bottom Color, Bevel Size
22.6.5.12 Drag Area
Click an animated object on the canvas (move, rotation, scaling, filling, pie), and click the "Drag Area" icon to create a "Drag Area" object.
Adjustable/Support Properties for Drag Area:
Position: X- Coordinate, Y-Coordinate
Animation: Left Top Color, Area Color, Transparent, Right Bottom Color, Bevel Size
22.6.5.13 Arc
Click on the "Arc" icon in the toolbar, and move the mouse to the middle of the canvas; the screen will show the reference line. Left click the mouse on the canvas area and then release; move the mouse to the canvas to continuously left click the mouse until the object is created. An "Arc" object will be created. Press ESC to cancel the drawing.
Adjustable/Support Properties for Arc:
Position: X- Coordinate, Y-Coordinate
Pen: Width, Stroke Dash, Pen Color
Others: Fill Color, Rotate
Animation: Move, Rotate-C, Rotate-CC, Color, Fill, Scale, Scale-H, Scale-V
Alarm Status: Alarm-Status, Alarm-Type, Digital-States, Multiple-States
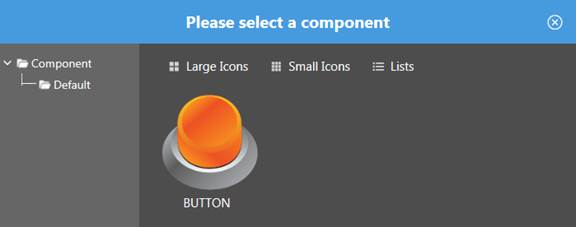
22.6.5.14 Component
The user can input the components on the current canvas, which facilitates the user to re-use a developed object. Please perform the following operation:
l After clicking the "Component" icon, a dialog box will pop up.
l Click the components to be painted on the dialog box and move the mouse to the canvas; left click the mouse to create a "Component".